I’ve had my Sennheiser DT 770 Pro headphones for about a year now, and I feel like I’ve never taken them off since then. They are by far on of the most comfortable things I’ve ever worn on my head. Of course, their sound is phenomenal, although some audiophiles might argue, that it’s too neutral, as their original purpose is for studio monitoring, not for everyday Hi-Fi use. Because the 3 meter long cable got quite annoying after a while, I put a Rean Mini XLR connector where the cord used to be. With an assortment of self-made detachable cables I can switch between whatever length and connector I happen to need.
When I bought the headphones I figured I’d just use my laptop’s microphone for conferencing as it’s on my desk anyway. However, since switching to my desktop for most of my work that was no longer an option so I decided to add a microphone to the DT 770. This kind of mod isn’t something completely new and you can find several pictures and sometimes even instructions on how to do it.
Design decisions
For one, there are the quick and dirty, simpler mods. People essentially glue or zip-tie a microphone and an extension cable to their headphones and leave it like that. Sure, that works but that also means you cannot detach the microphone easily which in turn means, you’ll have to deal with two separate cords from now on. Others use a separate socket to attach the microphone to. Yet, most of those mods use an audio jack plug for the microphone which I don’t like for two reasons:
- Having a Mini XLR and an audio jack just looks odd. That would mean I’d have to change the XLR socket to a jack socket which isn’t possible anyway, since the XLR uses a bigger hole in the ear cups.
- Audio jacks don’t have latching mechanisms meaning that they can rotate freely. That usually is desirable for most applications but in this case will lead to the microphone turning and dropping whenever you move too vigorously.
That sounds annoying to me. I therefore chose to use another Mini XLR for the microphone so that I could keep the whole thing aesthetically pleasing and to lock the microphone in place. To avoid the two-cable issue, I’d put everything into a single cord so nothing really changes for me in that regard.
Microphone
For the microphone itself I’m using a Hama brand VoIP microphone for around 12 Euros but pretty much any microphone with a goose neck will do just fine. It’s designed to plug directly into your laptop’s audio port but it’s working just as well with an extension. I removed the old jack plug and very carefully soldered the delicate wires to the Mini XLR plug. The disassembly was a little too rough for my liking, so the wires ended up very short. I fully expect the plug to fail eventually but so far everything held up nicely. Luckily, the Rean XLR plugs do have a very well designed strain relief.
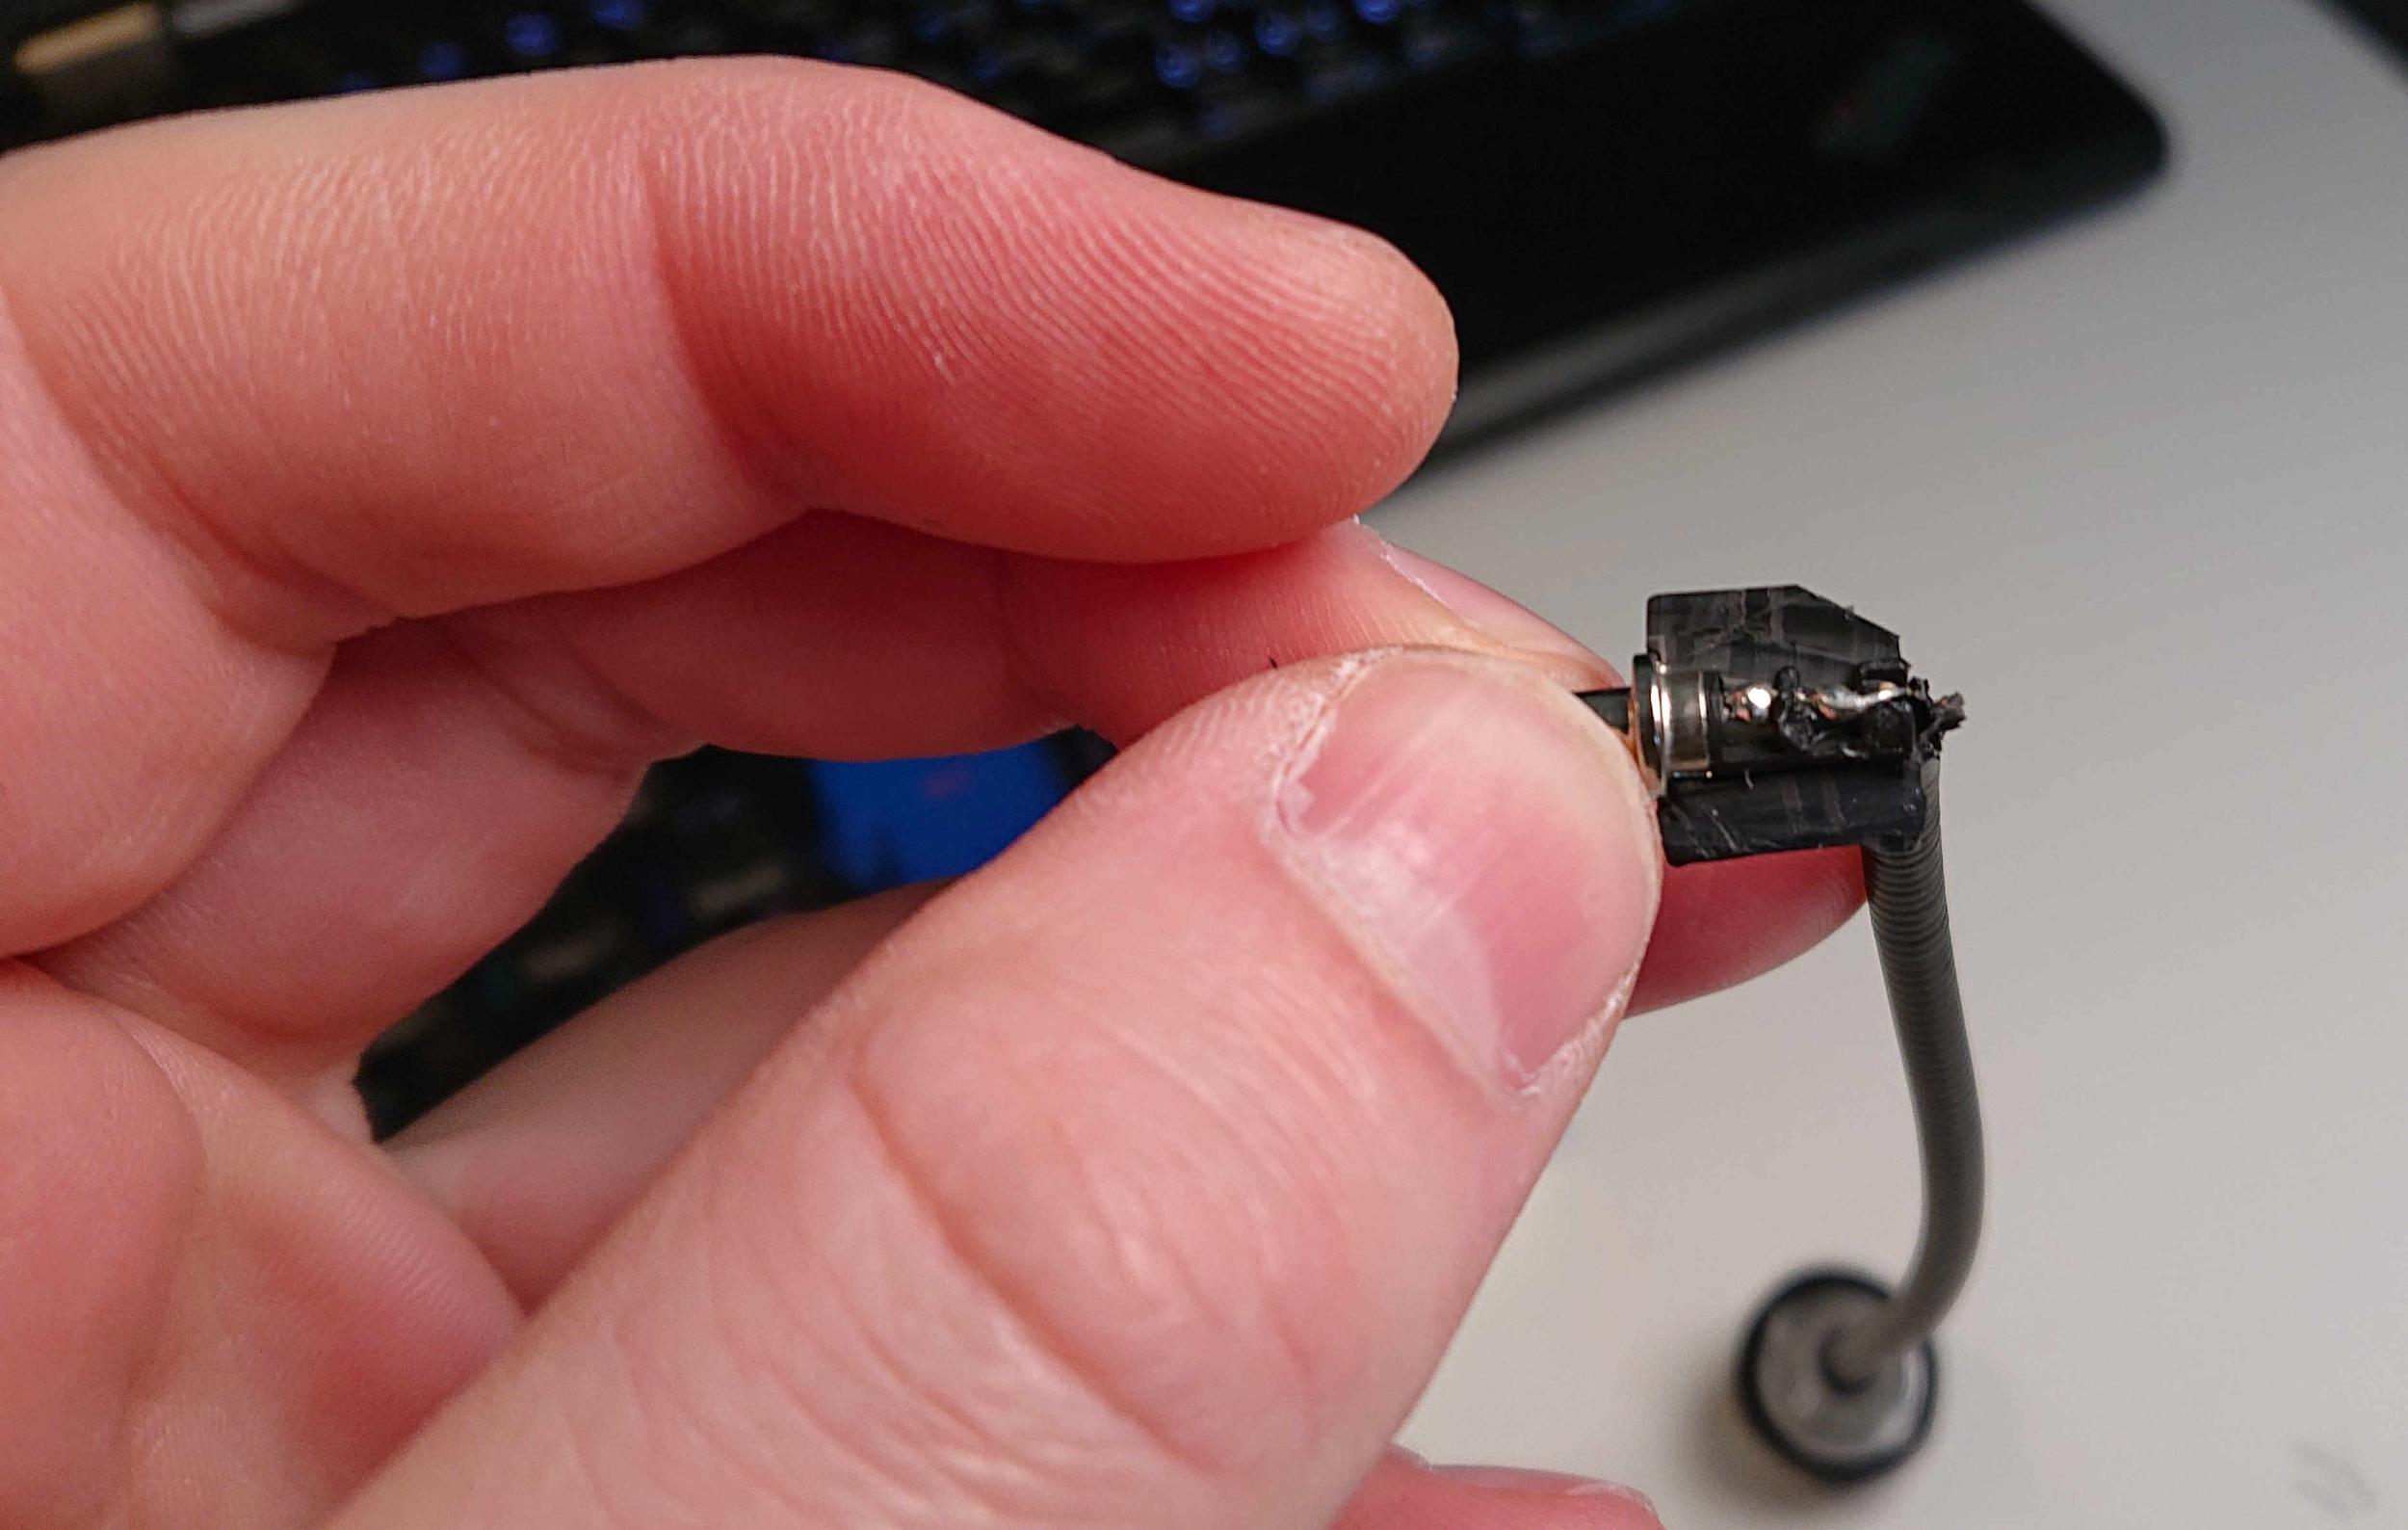
If you’re wondering: The microphone is mono, which means you only really need two pins, Signal and Ground. As far as I’m aware, there are no two-pin XLR connectors anyway.
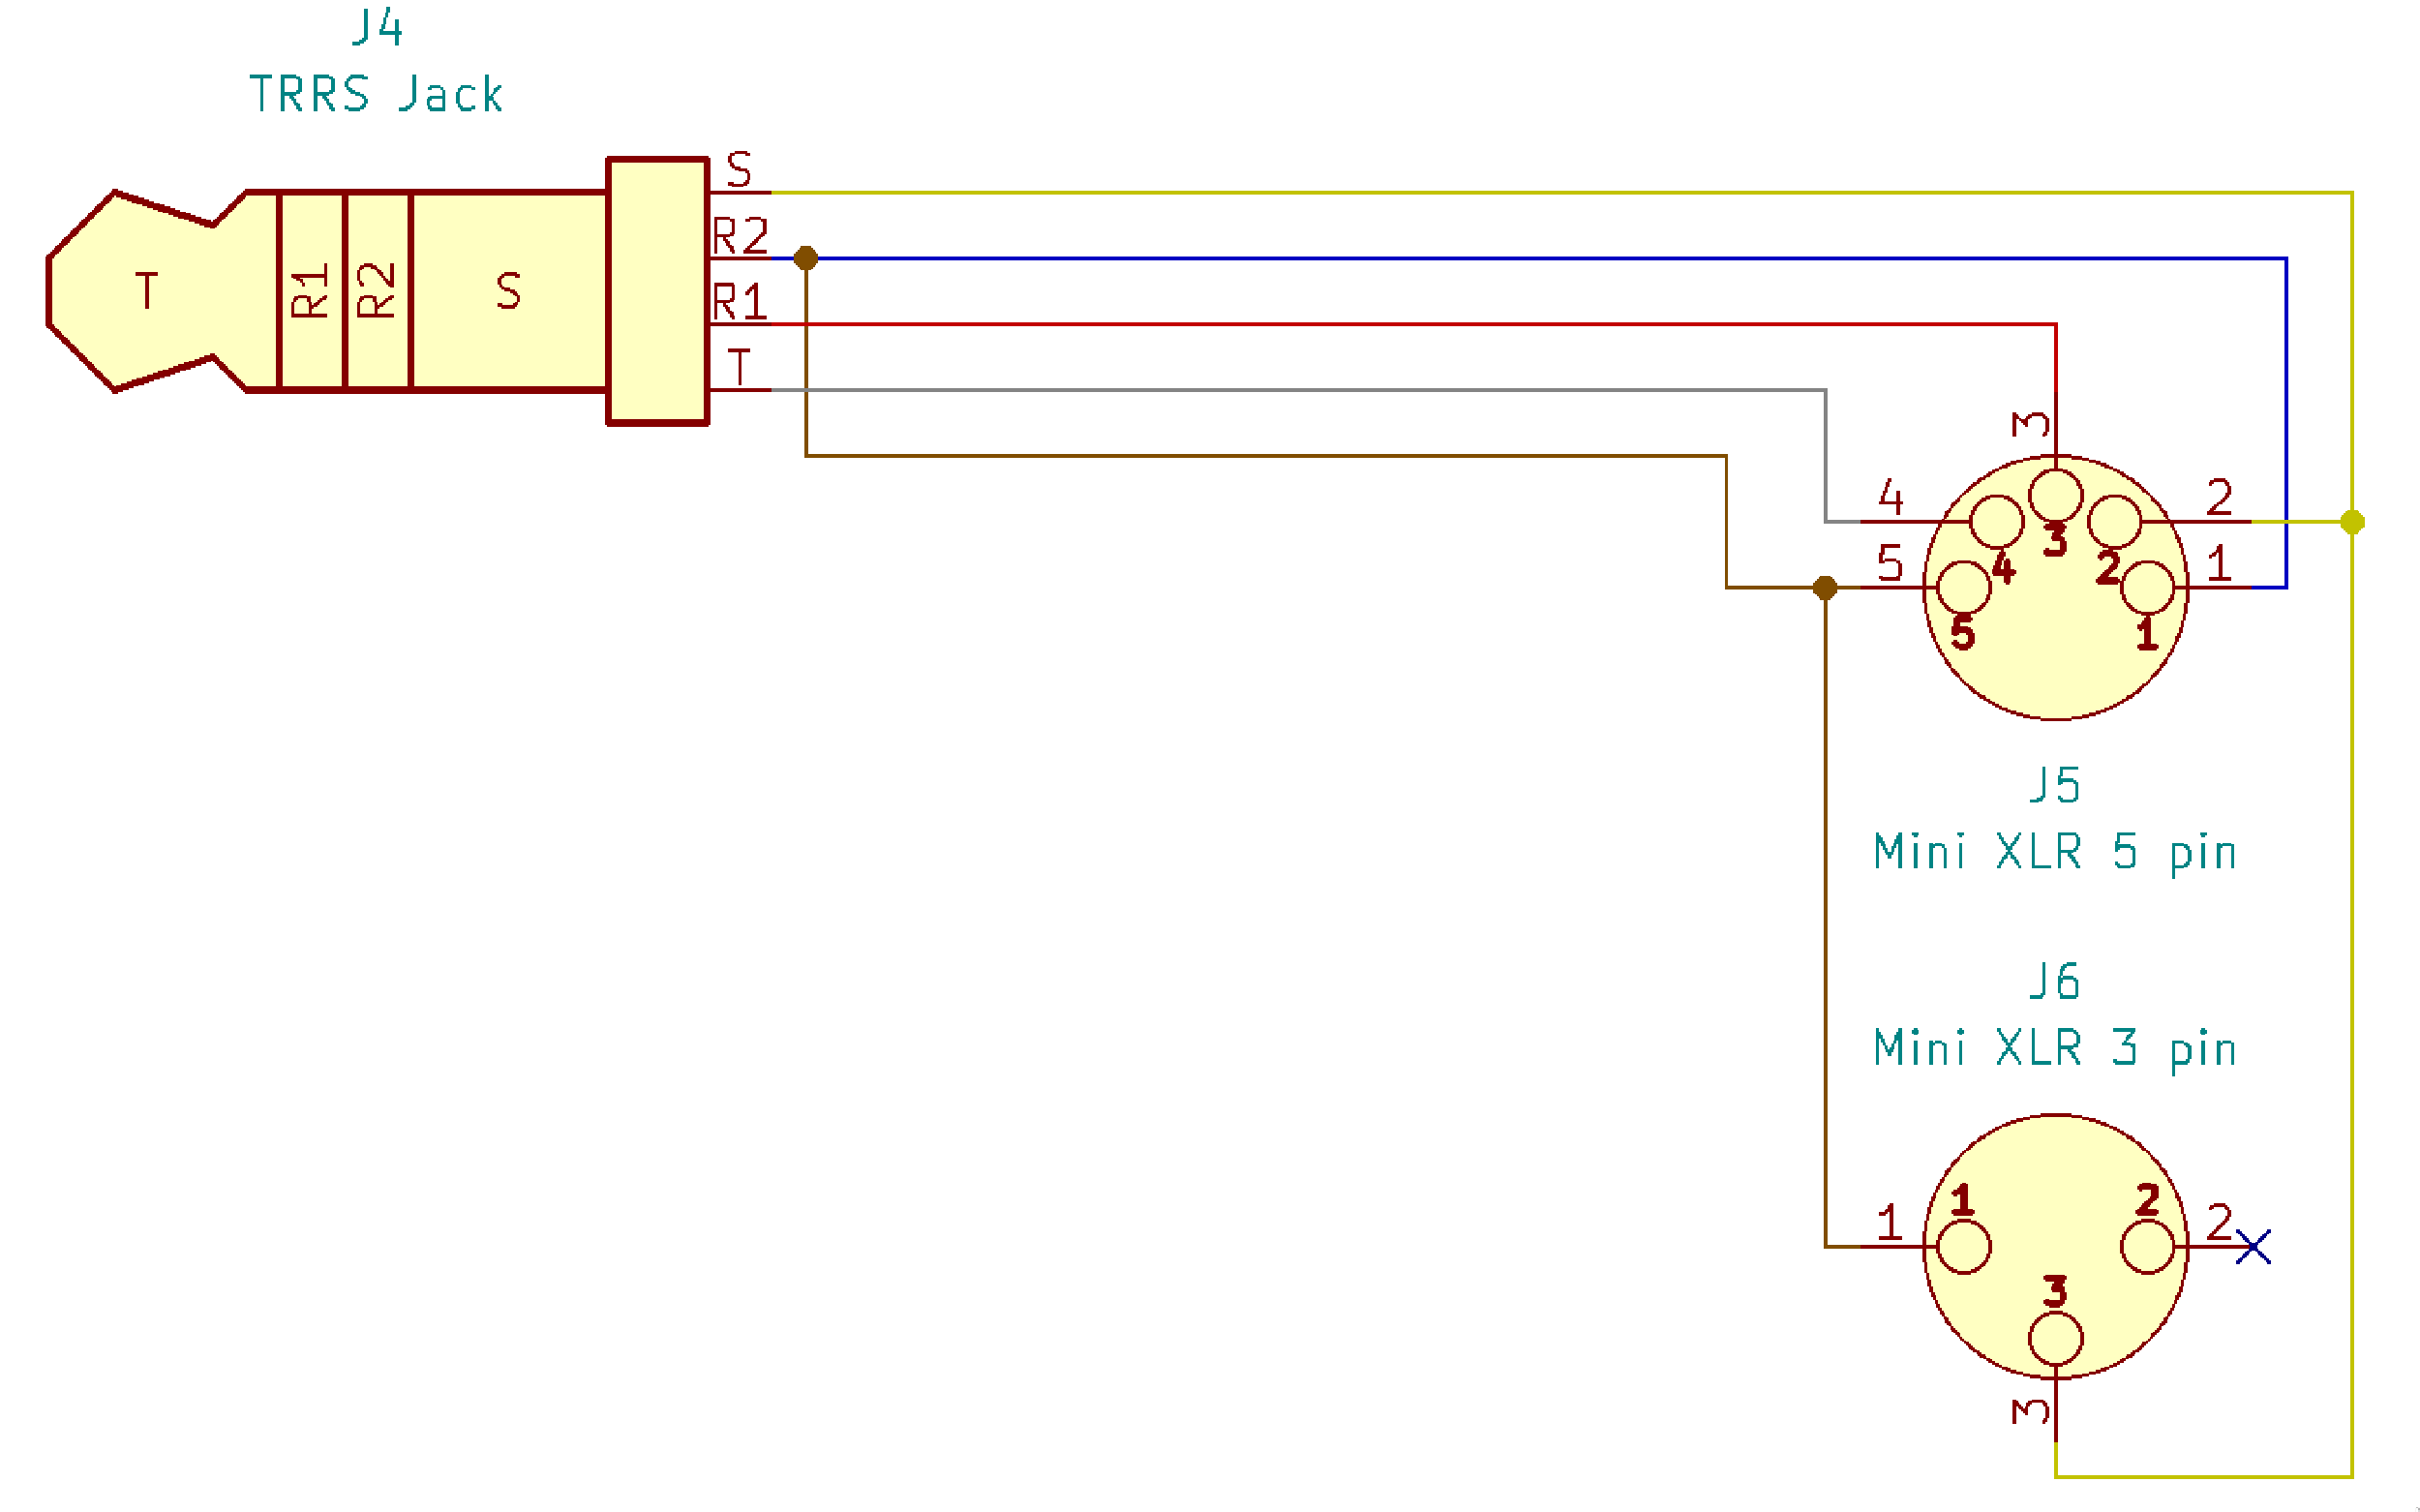
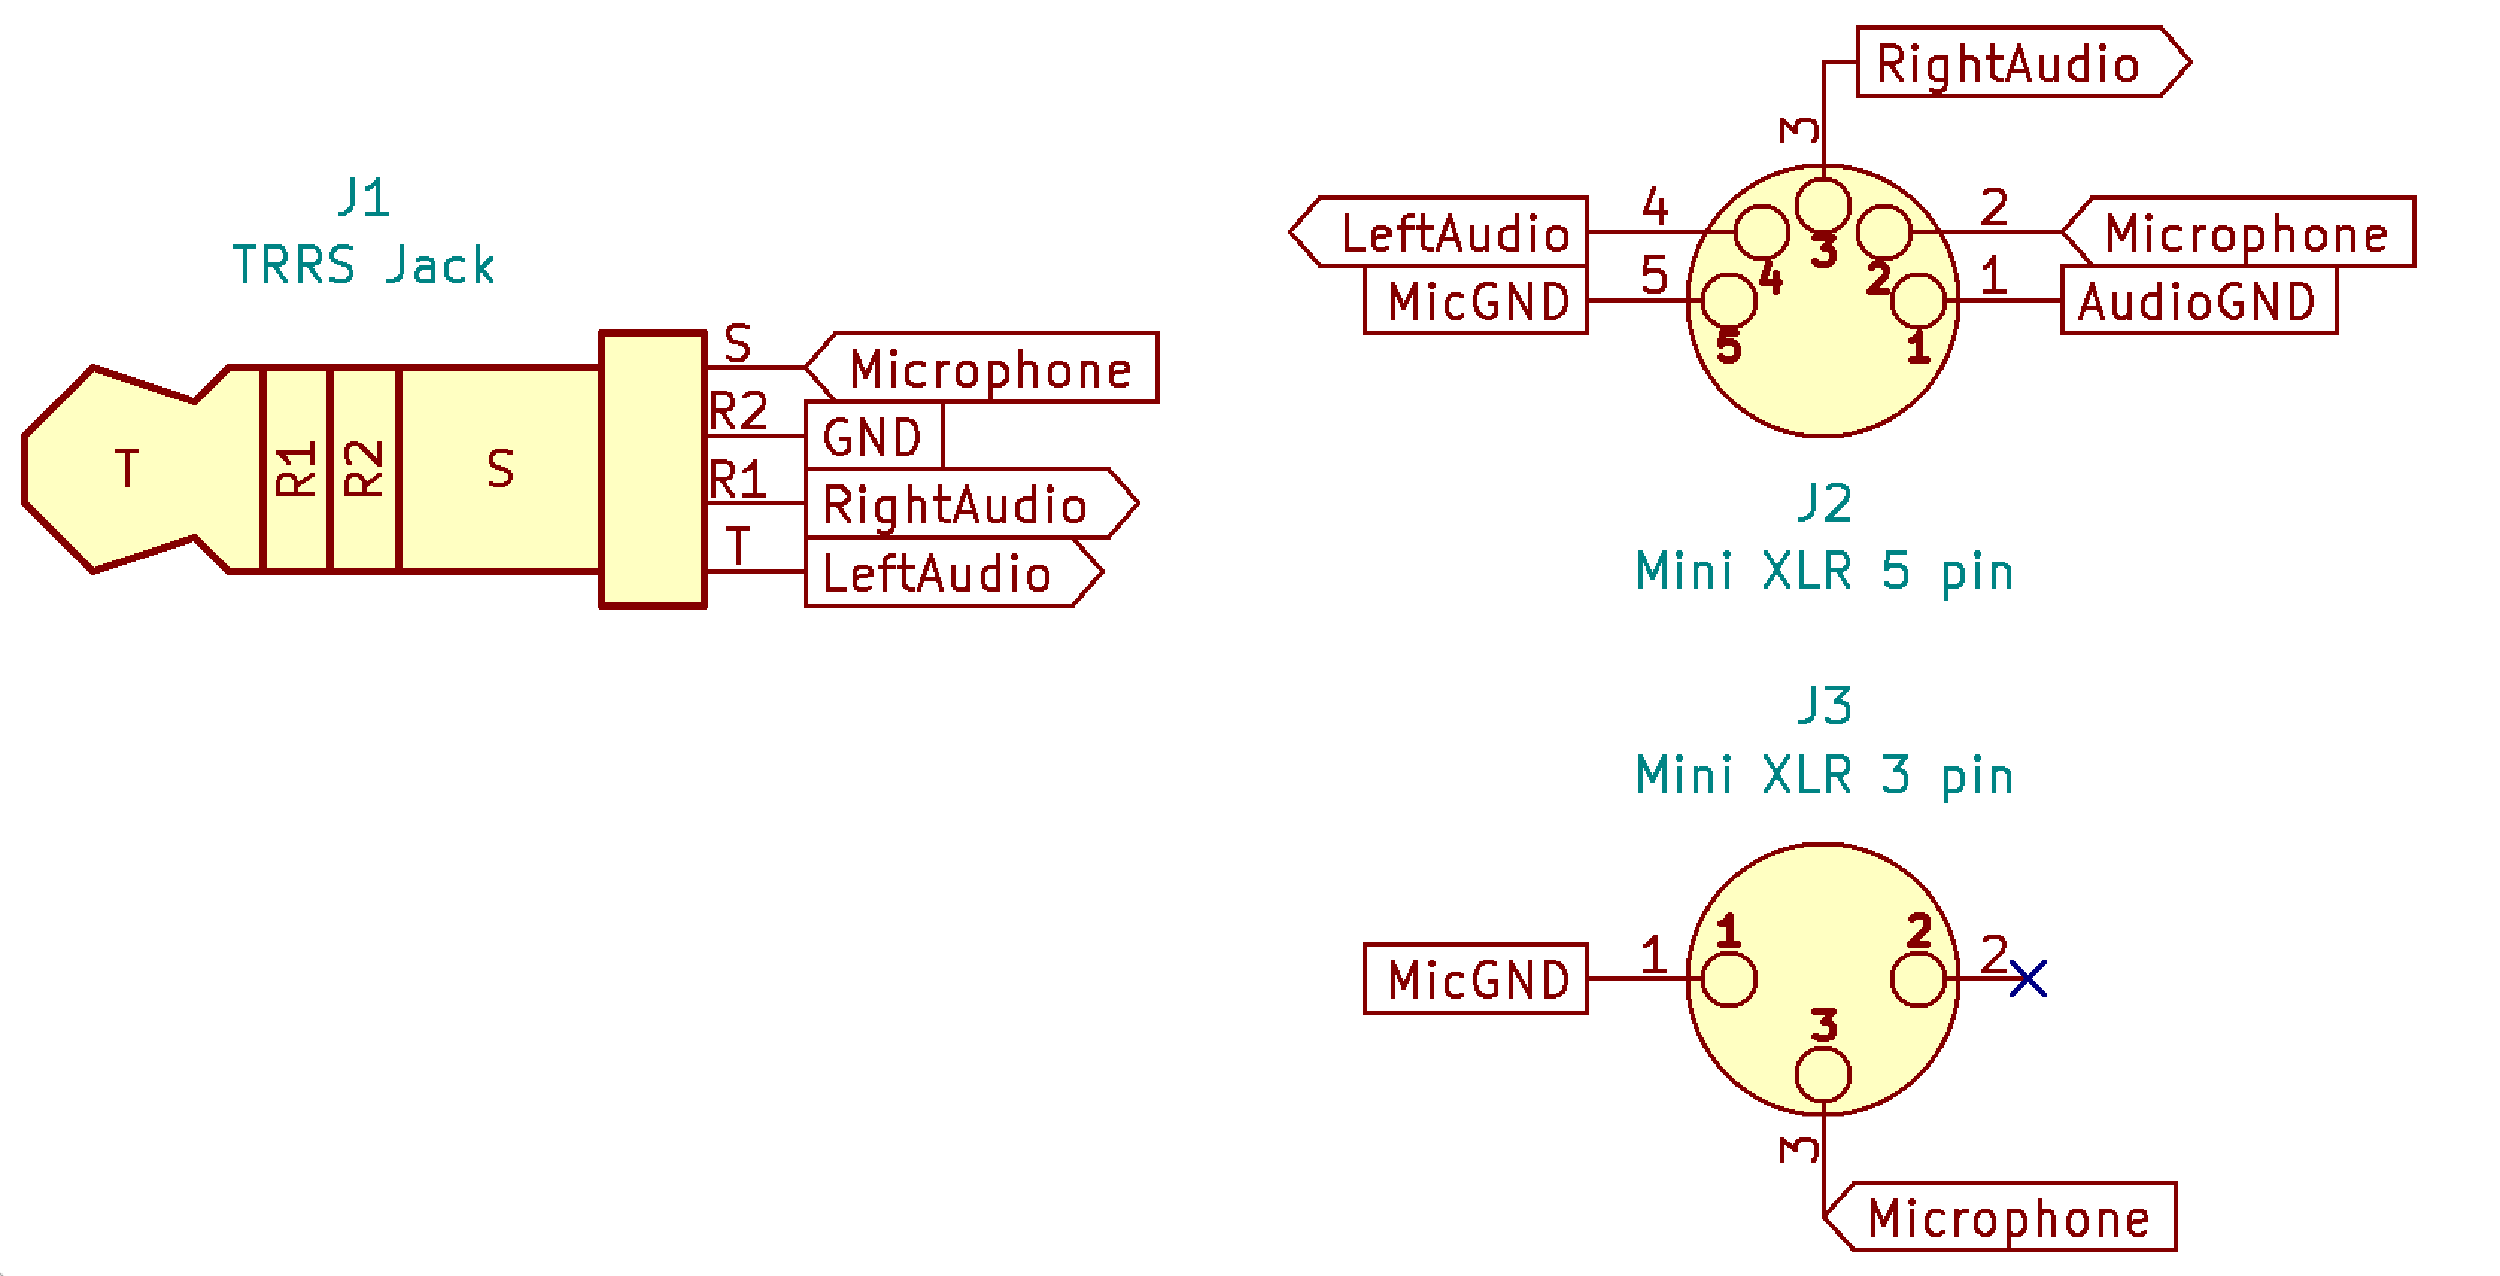
If you’re familiar with audio stuff, you might have already figured out that the old three-pin XLR socket won’t cut it anymore. The headphone signal uses three wires: Ground, Left Audio and Right Audio. But adding the microphone line into the same cable means I’ll need two additional wires. That’s not entirely true, though, as you could very well combine both grounds, making it just four wires. However, looking at how commercially available headsets with detachable microphones are wired and by delving into some audio theory, you’ll see that it’s best to join the two separate grounds as “late” as possible (ideally not at all) to reduce crosstalk. I’ve included a little drawing below to exemplify my bad explanation.
Long story short, I’m using five wires and a five-pin Mini XLR socket in the ear cups. On the sound card side you essentially have two options:
- Keep the cable (and the grounds) split into two separate plugs. One three-pin for the audio signal, one two-pin for the microphone signal.
- Merge the grounds into one single four-pin (TRRS) plug.
Option 1 is the best if you’re looking for the cleanest sound achievable as the grounds are kept separate for as long as possible. However, if you’re using only the headphone part and no microphone, there’s always one plug dangling about. I’ve decided to use option 2 to keep everything neat and tidy and all of my devices support the four-pin plugs anyway.
Drilling and filing
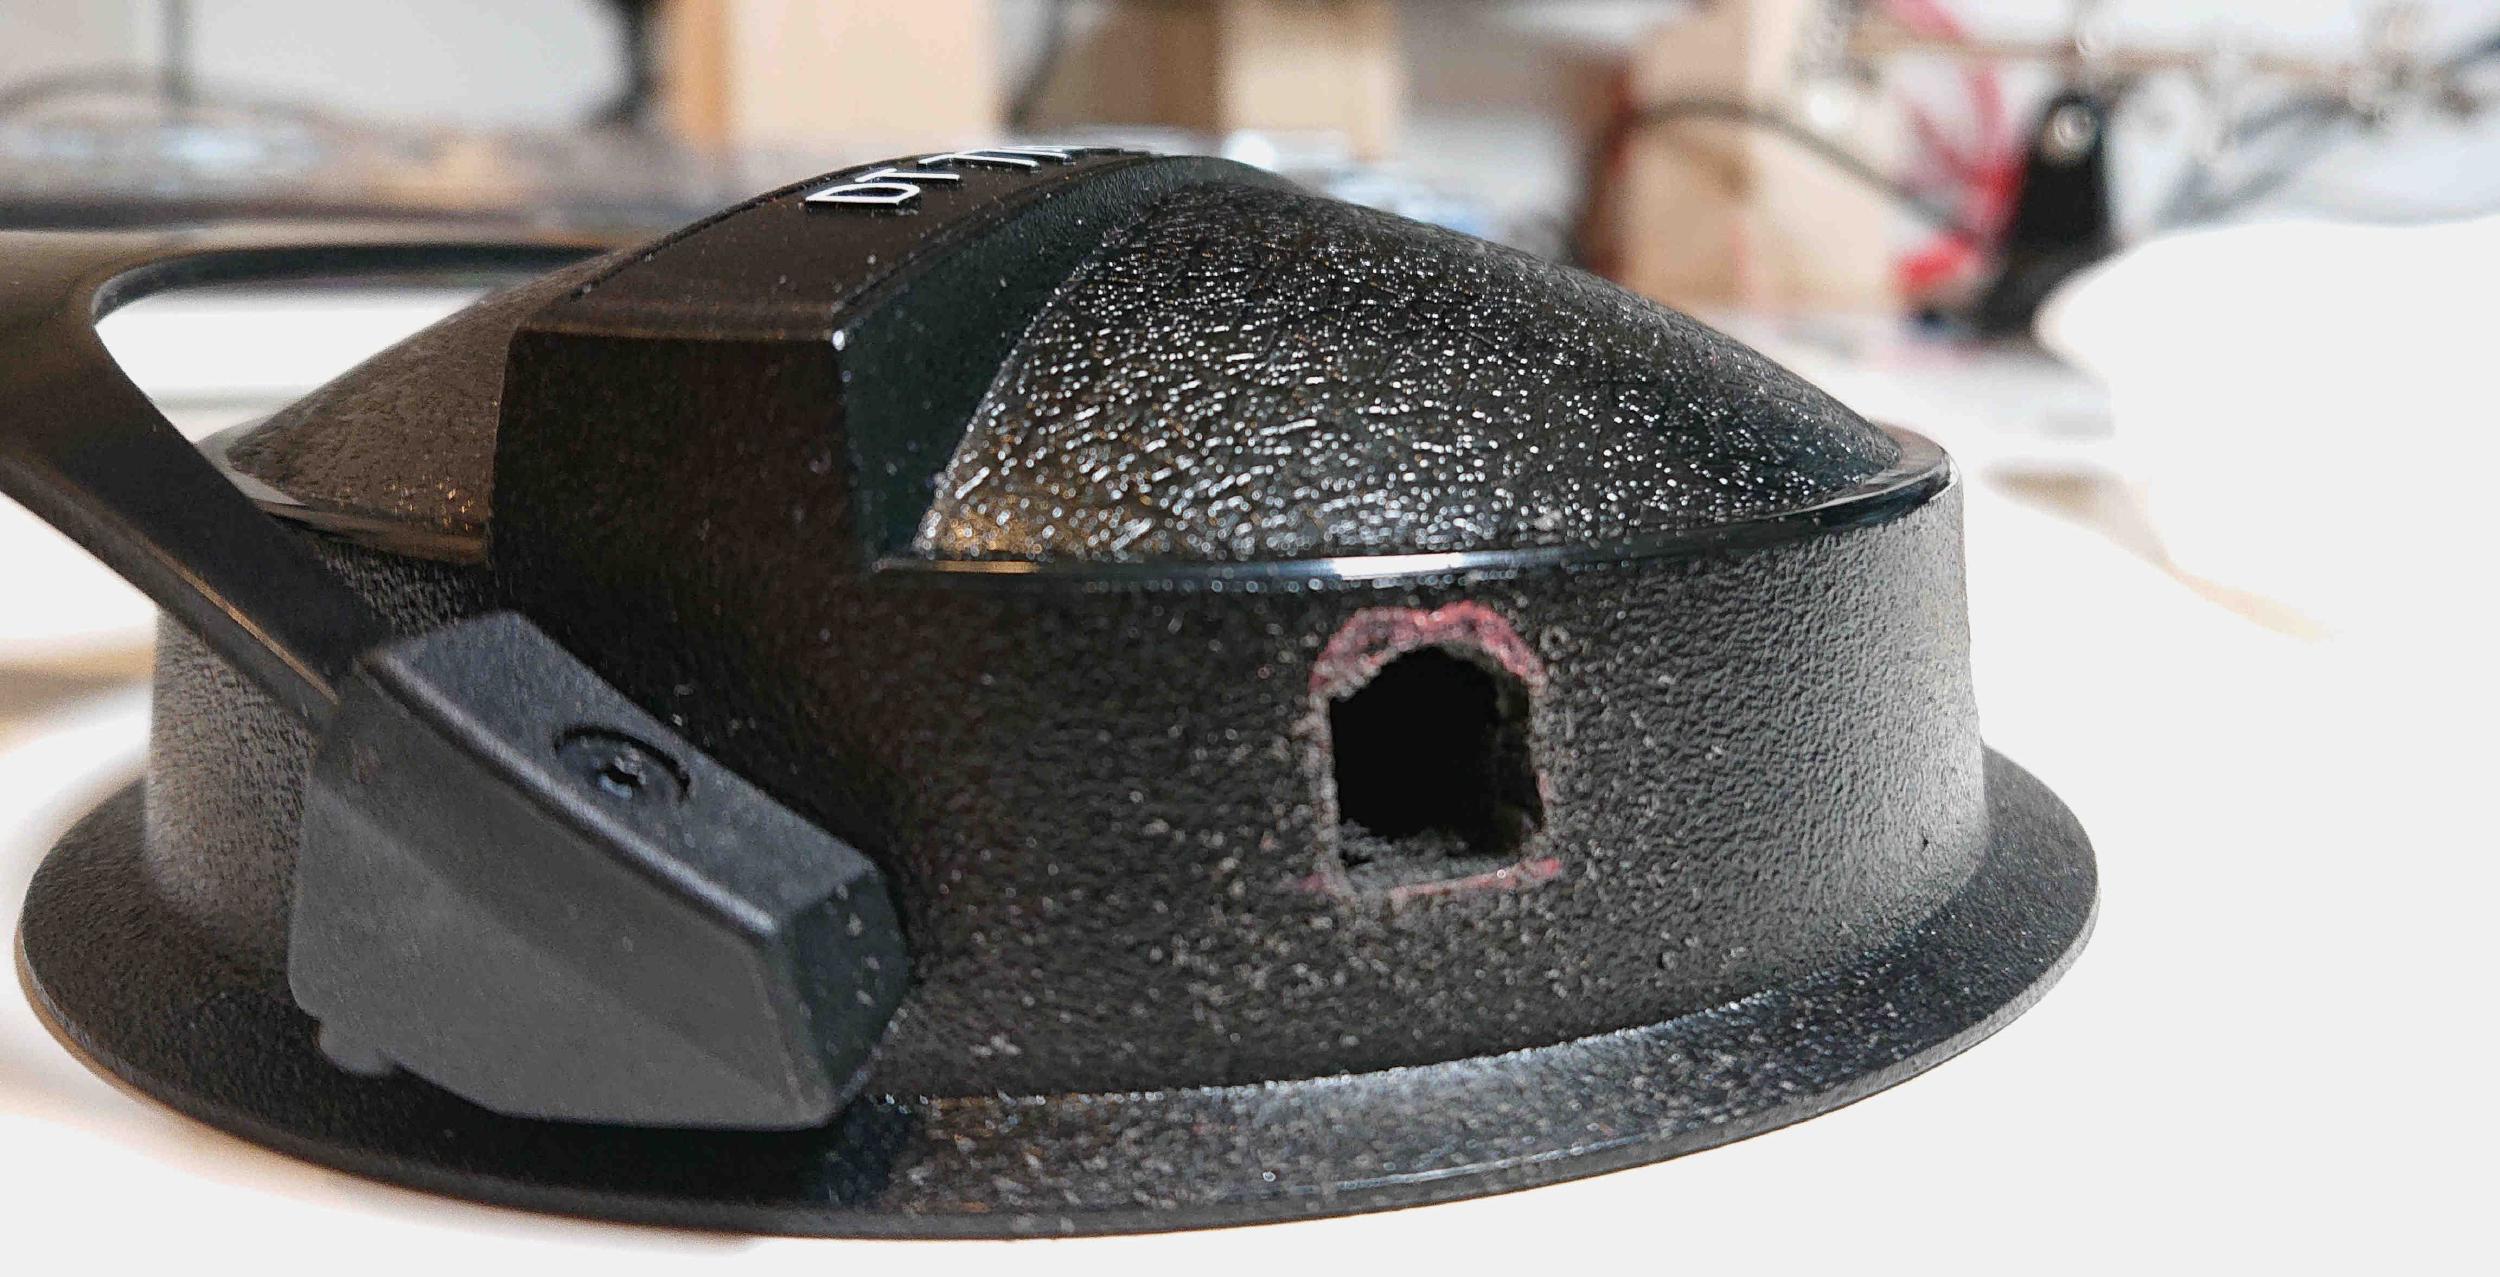
Now, on to the Mini XLR socket. Before I drilled the new hole I measured and marked everything very carefully as space is tight inside the ear cups. Most guides just use the socket as it is but I like to file down the flat section a bit more which allows the socket to sit almost in the center of the ear cup when looking from the outside. If you don’t file it down, you’ll have to move it down (away from your ears) quite a bit which then results in a weird look where the socket’s lip is sticking out weirdly. I drilled the hole undersized, then filed the shape by hand. Some people use a rotary tool but the plastic is very soft anyway. Doing this by hand also allows minute adjustments to the fit which I prefer to be very tight to give the socket some additional support.
Assembly and wiring
I missed to take a picture of the finished hole which, obviously is round-ish in shape and not rectangular as shown here. With the hole properly shaped I can insert the new plug. It’s easier to wire up as much as you can before stuffing everything into the ear cup. The wiring doesn’t follow any standard and just has to match whatever you chose when wiring the microphone.
Normally, the sockets are supposed to be held in place from the back with an included washer and a very slim nut. Of course, due to the lack of space, neither the nut nor the washer would fit on the threads so a liberal amount of hot glue is used instead. This is way stronger than you might expect and seems to be the “modding standard”. The DT 770s have a ring inside that acts as a spacer for the driver. This ring already has a cutout but it’s just not big enough to fit the second socket as well so some trimming is required. There are people that like to flip it around or cut whole sections out of it but that’s a little too invasive for my liking.
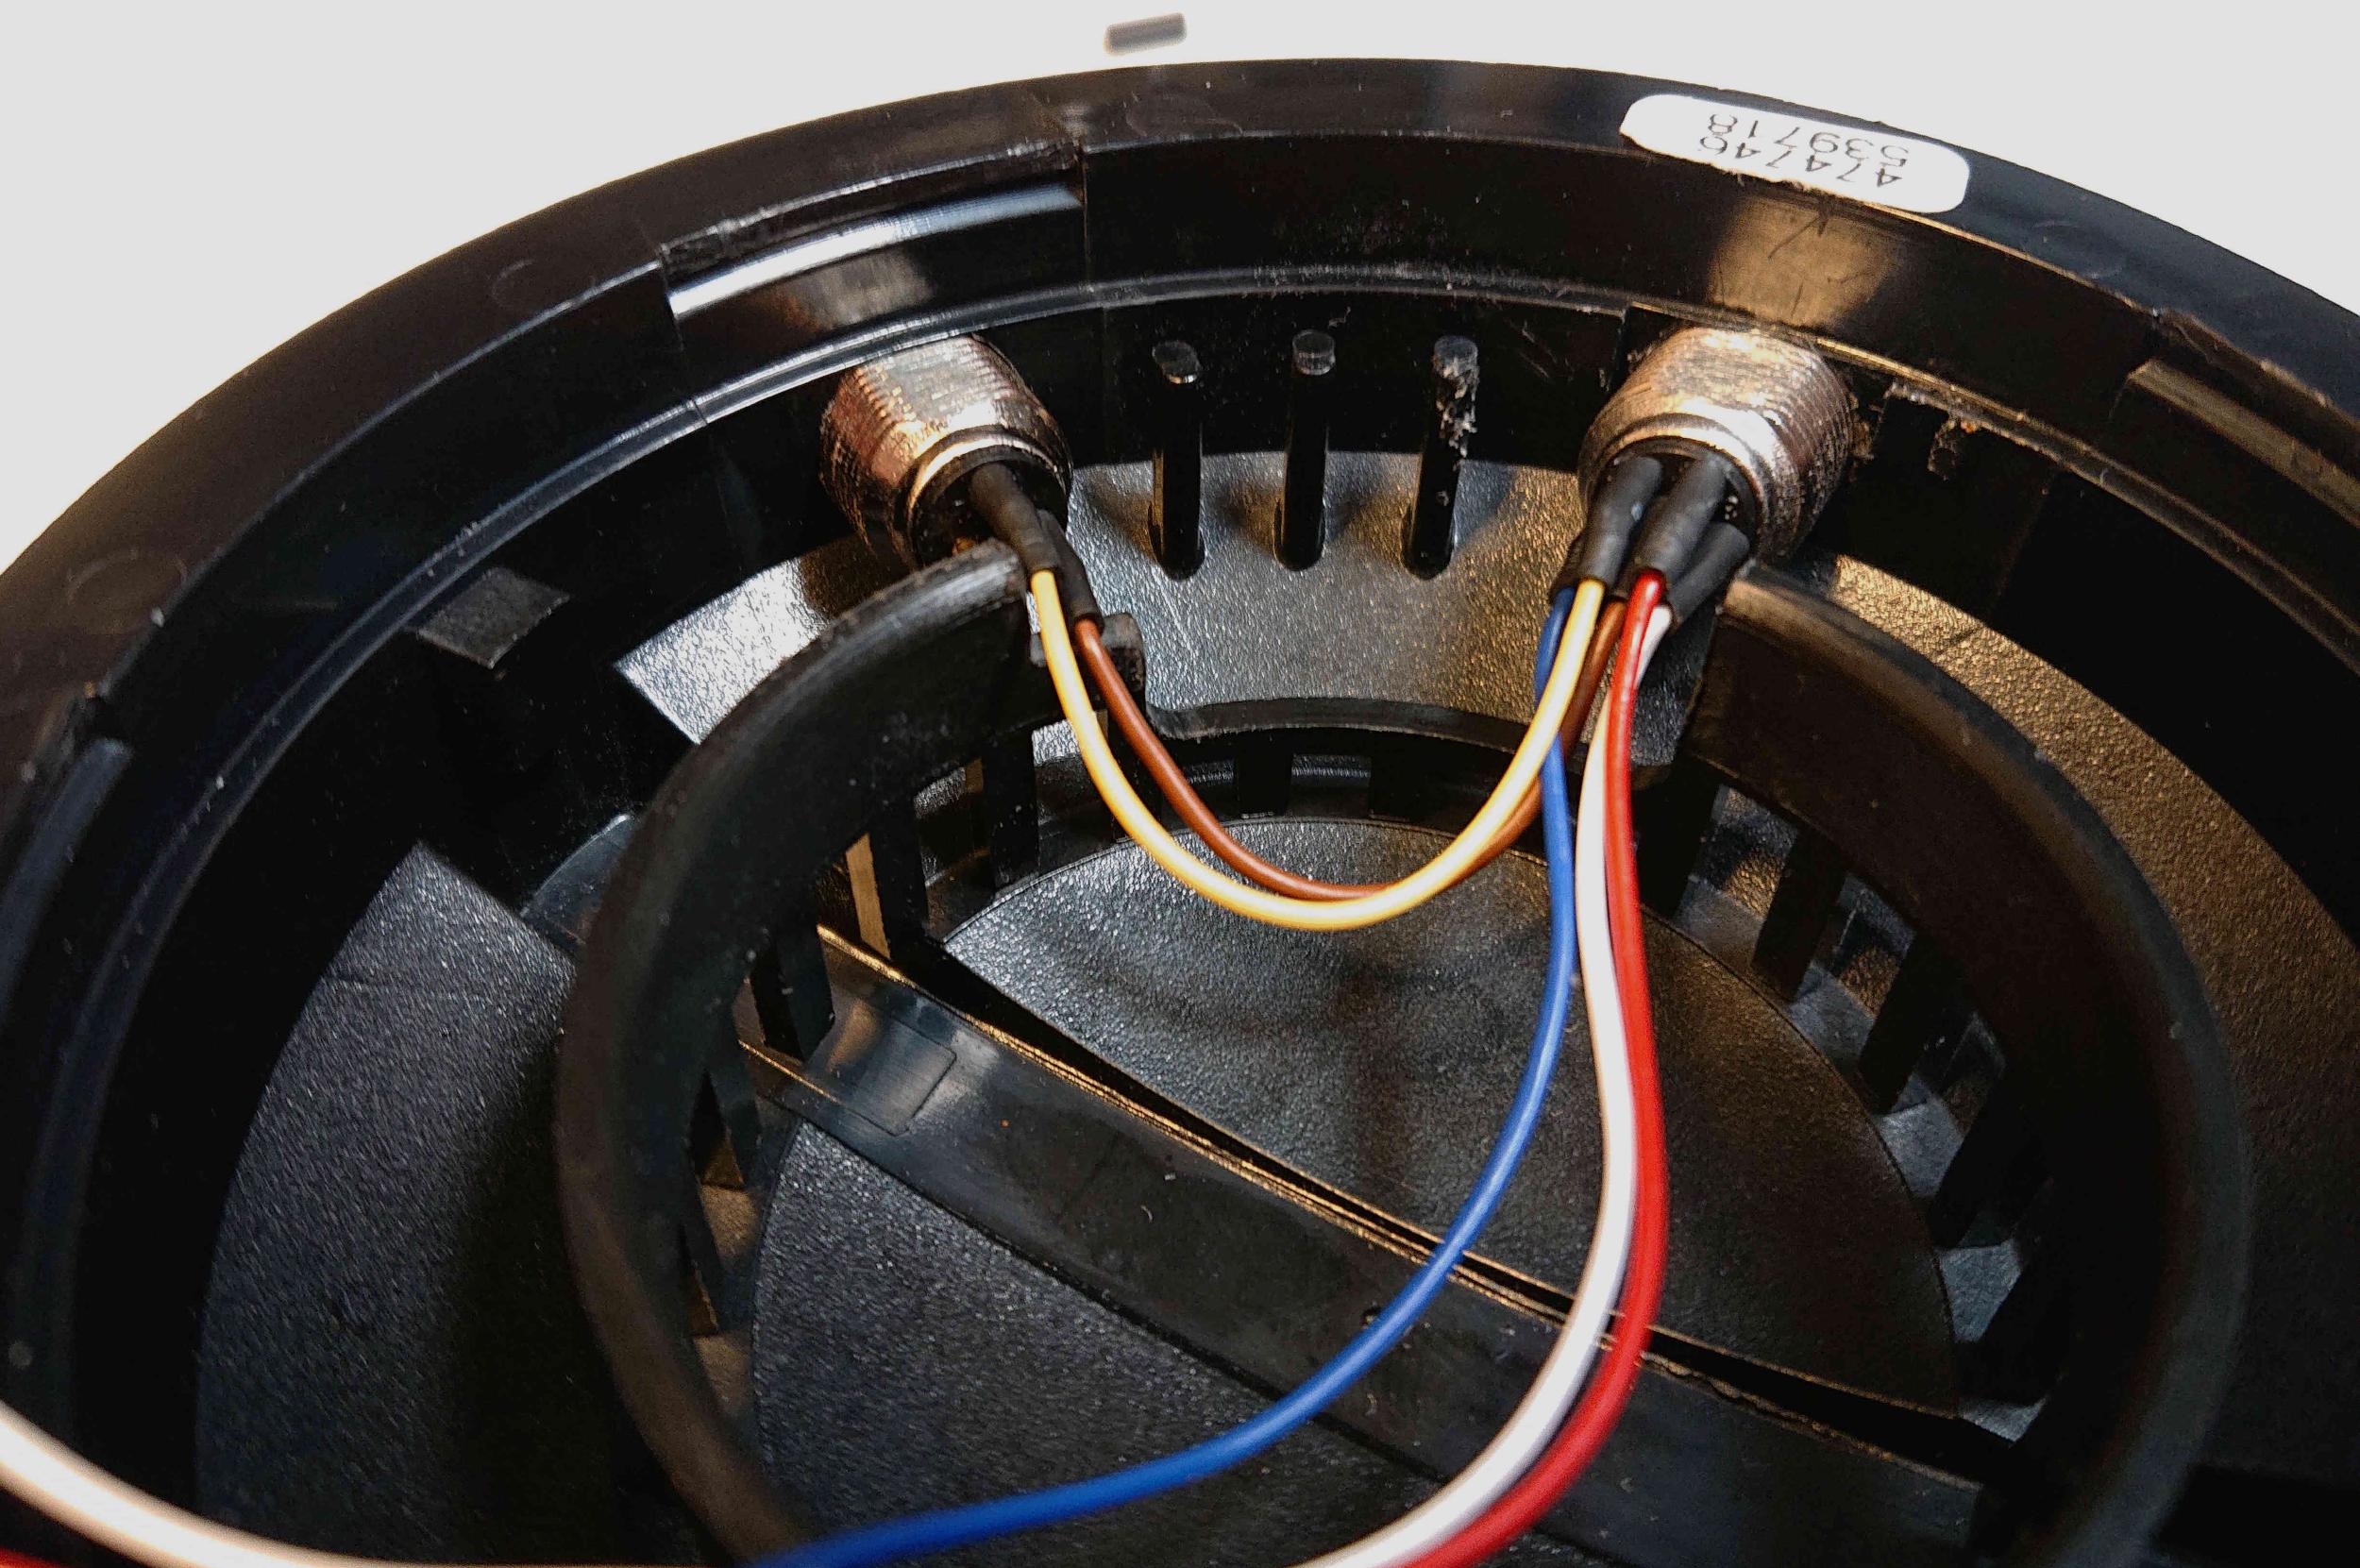
In this picture you can also see how the flat section of the socket lines up perfectly with the little lip inside the ear cups. The driver rests on that lip so it’s quite important to stay below that if you want to put the earphones back together.
That’s pretty much it. All that’s left to do is putting everything together. With my aim for a overly neat look that was a bit of a challenge as every part had to be exactly at the right position to make it go together.
Fixing silly errors
When testing my new headset I felt like the left side was somewhat quiet, compared to the right side. This can be easily checked by measuring the impedance of each channel against ground. The value should be very close to the impedance of your headphone model. In my case that’s 80 Ohm. I got 80 Ohms on the right, 160 Ohms on the left ear. Having realised and corrected my mistake by re-soldering the wires in the correct order, the imbalance was gone.
Wiring scheme
I’d rather have too much documentation than to little so I’ve made a labelled overview of the wiring as well.
Done
I’m very pleased with the result, especially since it looks really clean and works flawlessly. There are only two minor things I’d change next time. One, the microphone position is slightly too high and could be moved down (towards the cable) by around 5 millimeters. Two, the microphone itself is a little on the long side which is beneficial in terms of sound quality but also means I have to move it to the side if I want to drink or eat.
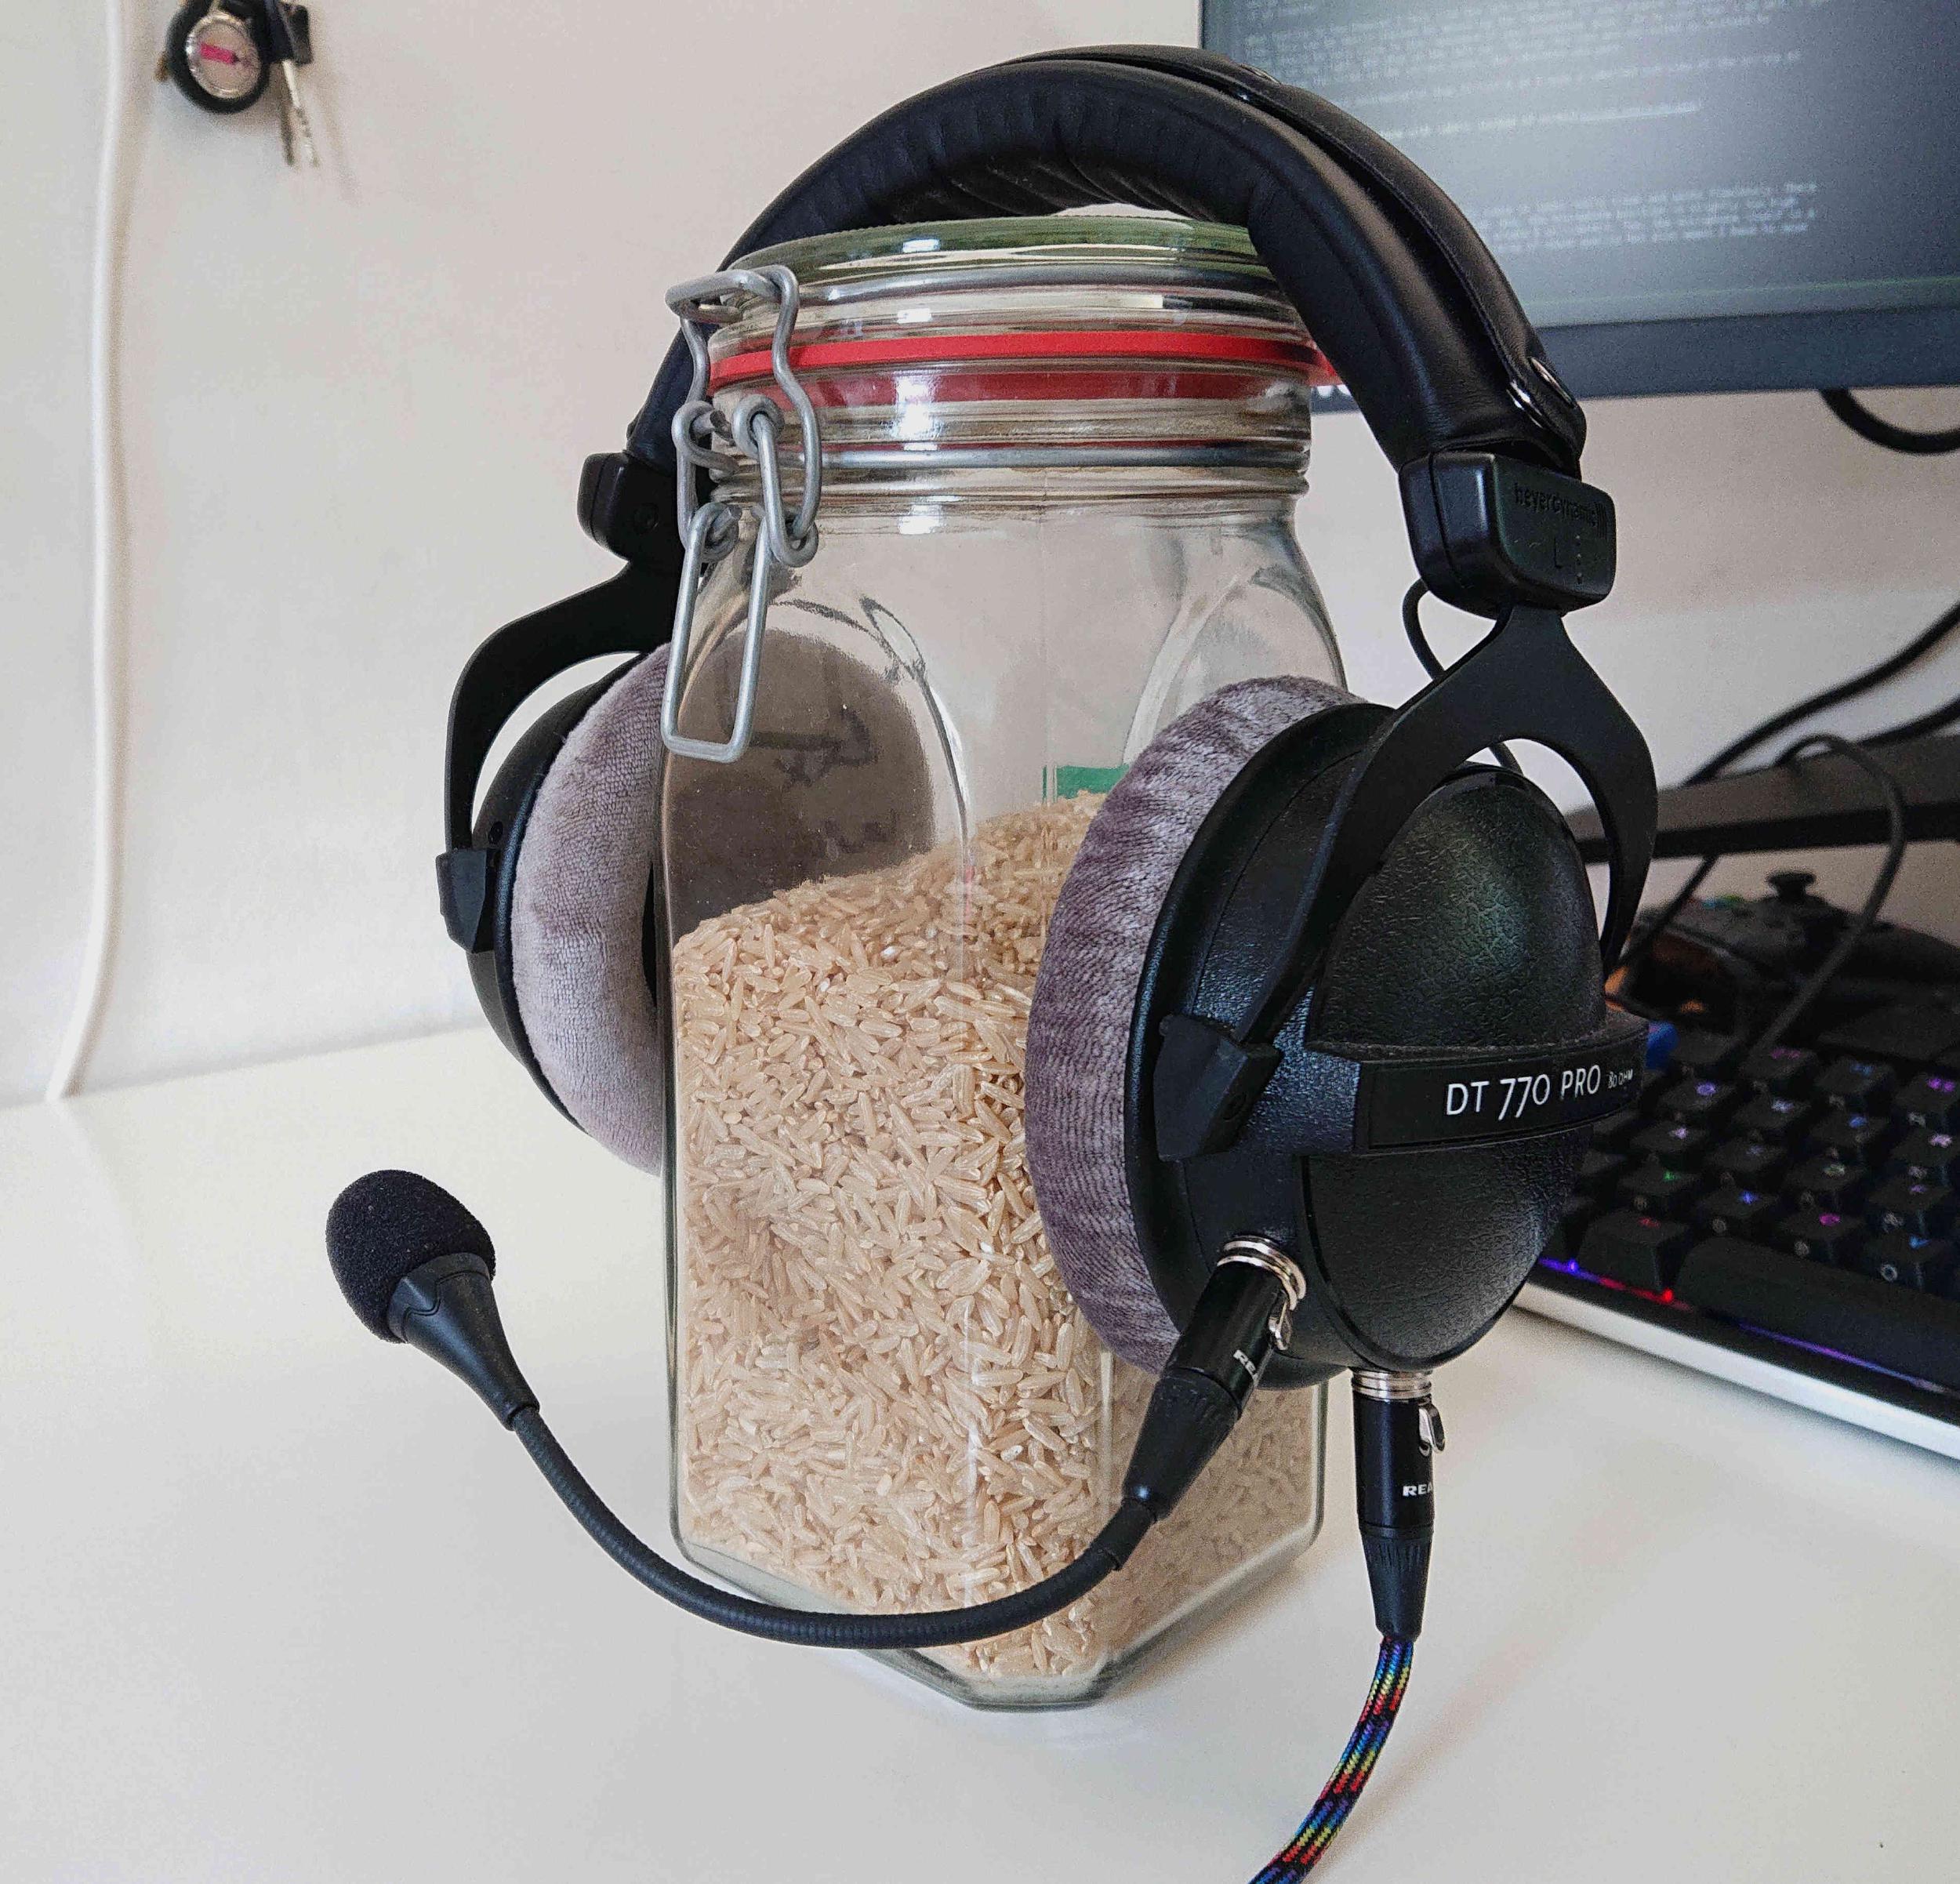
Update 12.06.2022: I’m rather pleased so far. By now I’ve shortened the microphone by a few centimeters which makes it way easier to handle. I’ve also noticed that my wiring scheme contained a few erroneous connections and labels so I’ve uploaded a correct version.
You can find the wiring scheme for this project in the corresponding git repository.